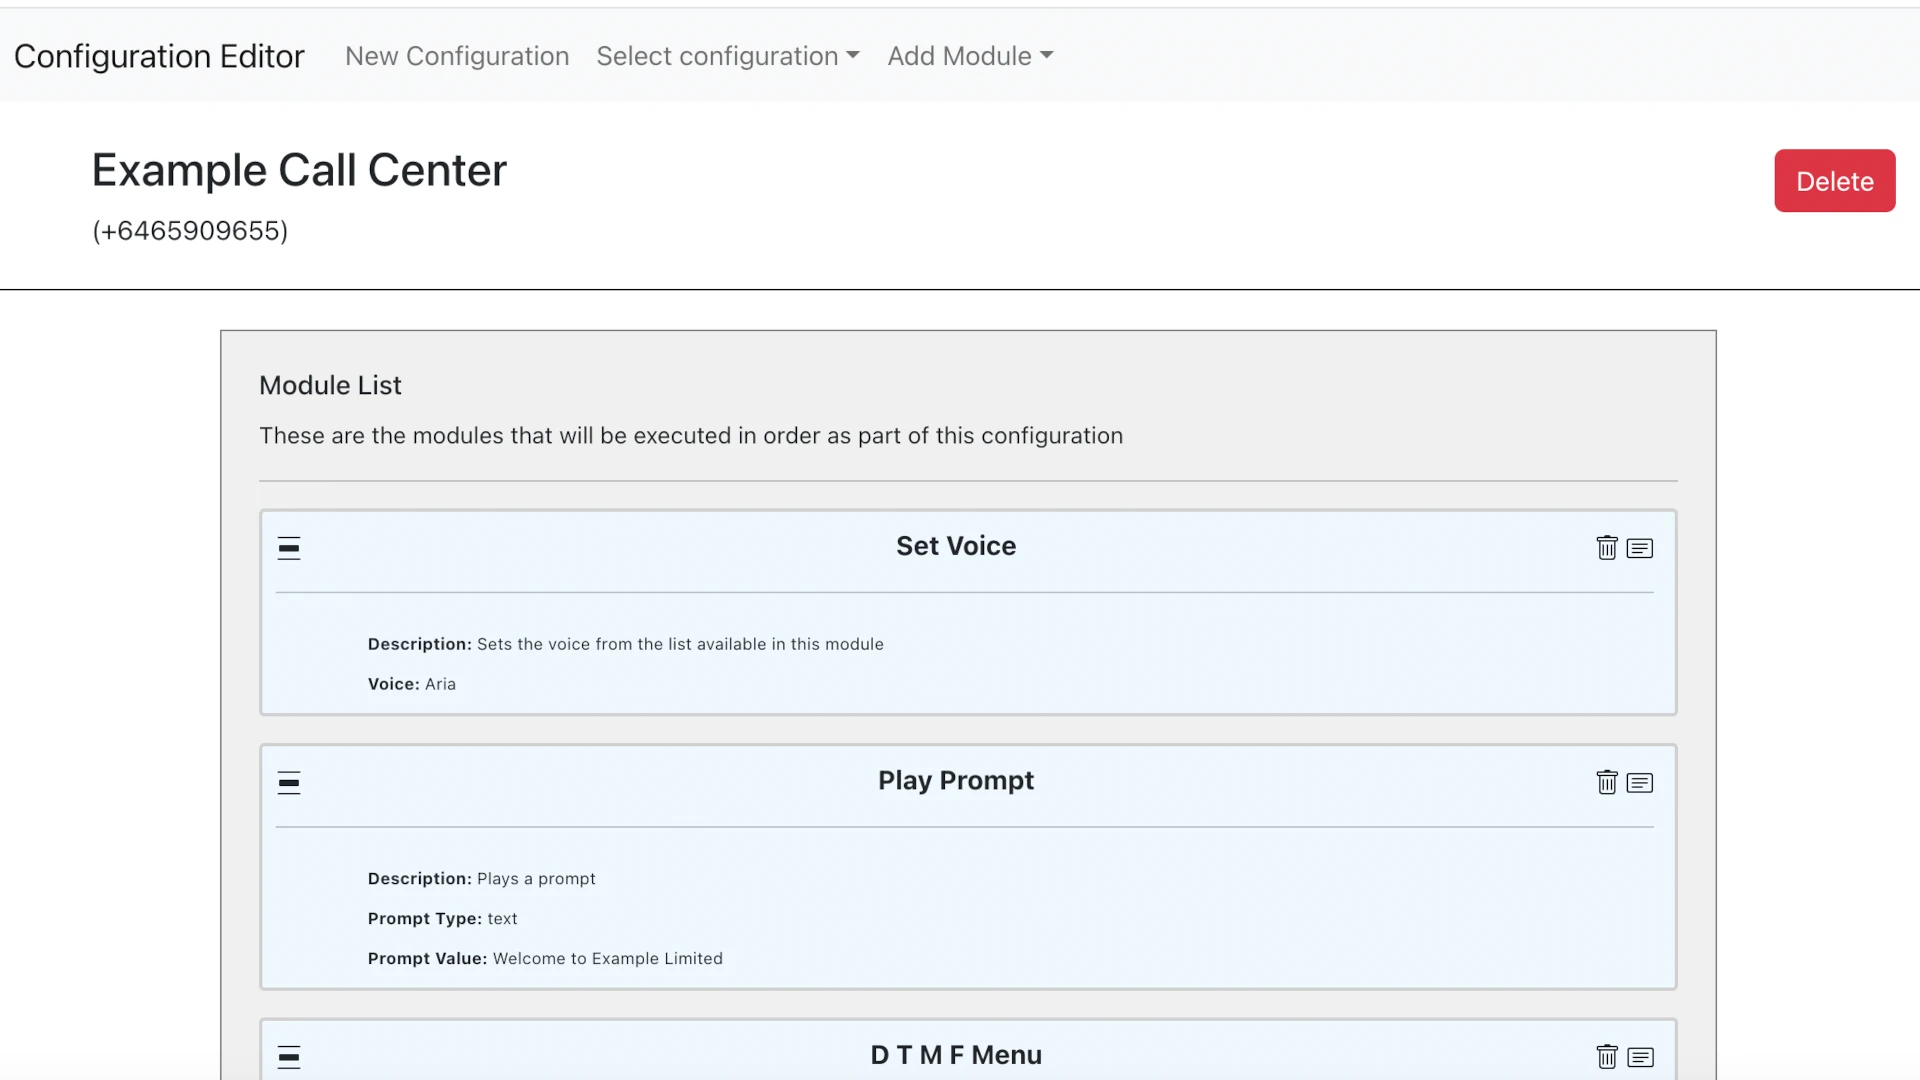
This is the second part of a series of blog posts about building a comprehensive Amazon Connect Modular Solution. In this part we are looking at the front end for configuring the solution that we have built in Part 1.
Demo video
Click here for a demo of this modular solution on my channel on YouTube
Solution Design
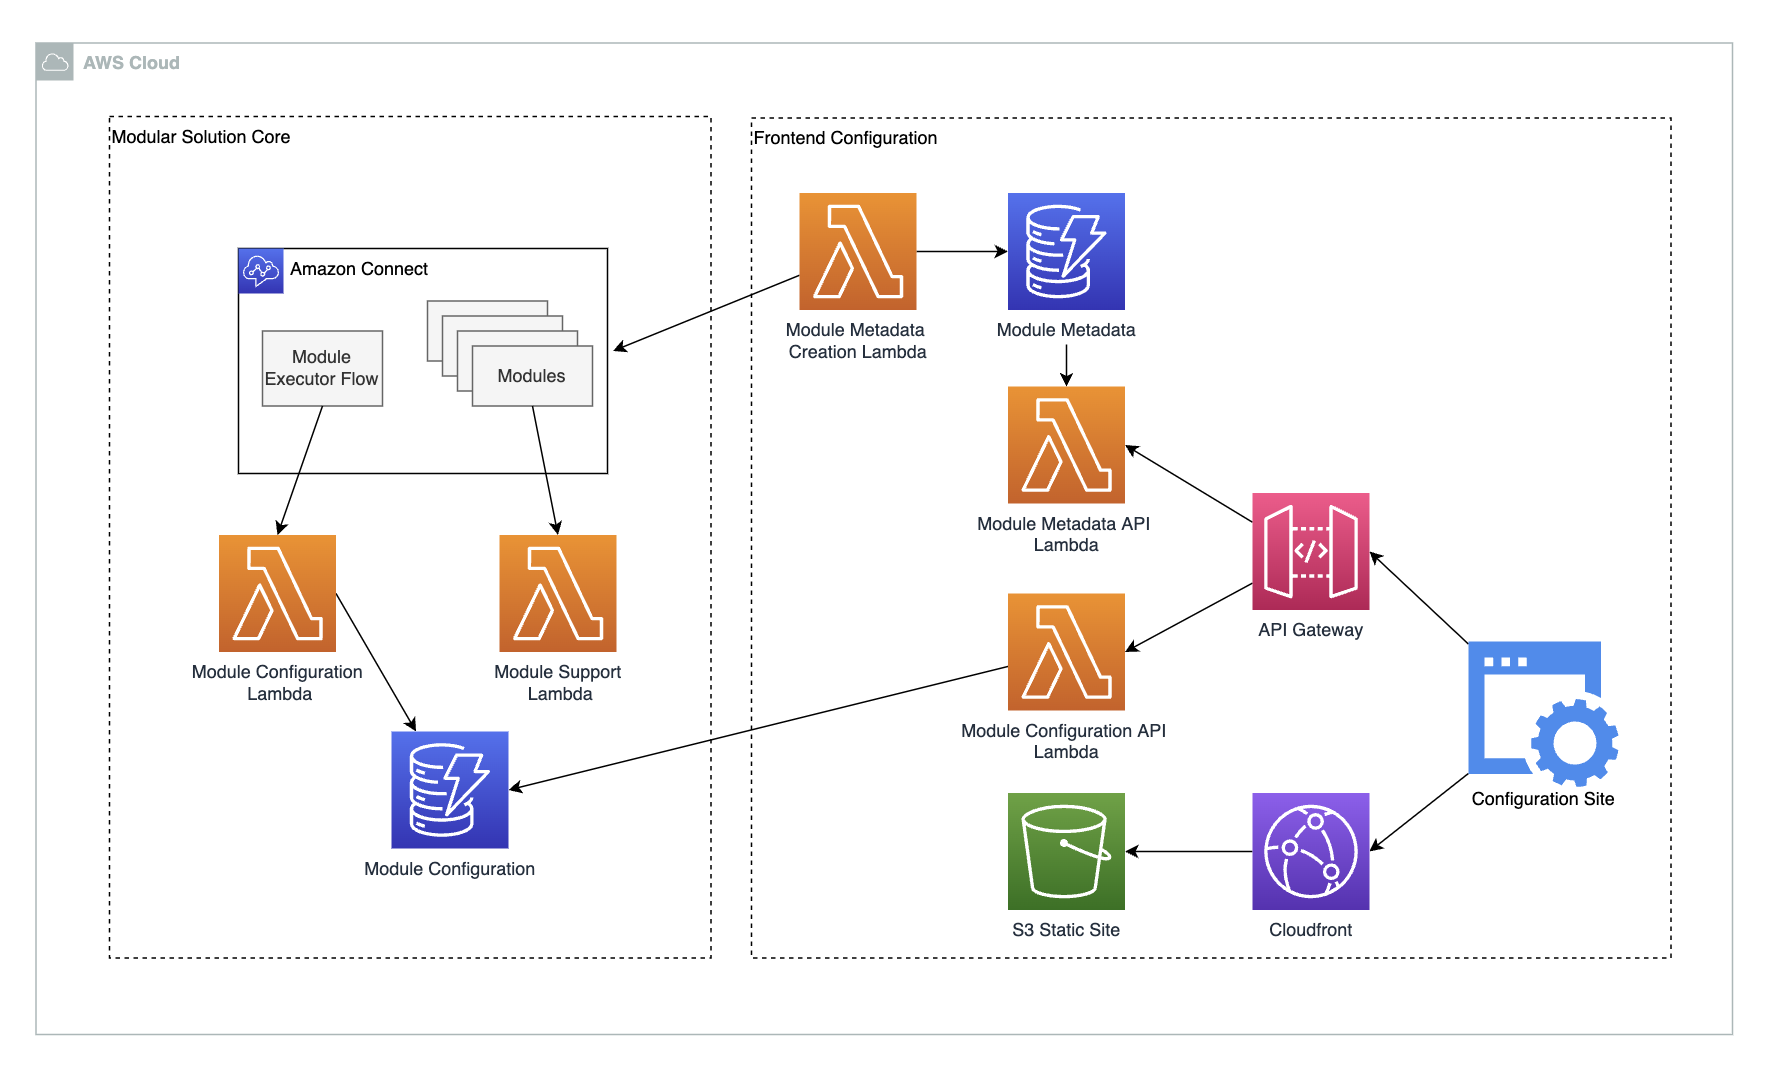
High level architecture
For this part of the solution we are going to be looking at the front end configuration. We want to provide a way for operations teams to manage the call center and to make changes as required. An operations team should be empowered to make the changes they require but also to have some guard rails to ensure that the changes they make have an acceptable level of risk.
The modular approach to call centers lends it self to this, as there are only a limited number of settings exposed by each module there is inherently a limited scope of change that can be applied. The functionality of the module will not be affected only the configuration of that module.
With this in mind, we now need to look at how the configuration of the modules is specified, and which settings are going to be available.
Module configuration
Modules need a consistent way to be configured. In the last blog post we looked at how the settings/configuration would be stored in Dynamo and how it would be provided to the module for execution. However we need to have some more information about the settings that a module will use. As we will be building a front end to configure these modules, we must list and describe all of the settings available with their names, descriptions, acceptable values etc. We will do this using some module meta data that we will associate with a connect module.
Module Meta Data
Modules need to have some associated meta data, a description of the inputs and outputs that the module uses. We are going to store this metadata as JSON such as:
{
 "moduleId": "e8e2efa6-dc0f-4a5c-8ad2-8f37b687d7b1",
 "name": "PlayPrompt",
 "description": "Plays a prompt",
 "settings": [
  {
   "description": "This is the text that will be played",
   "name": "PromptValue",
   "required": true,
   "type": "text"
  },
  {
   "description": "The type of the prompt to be played",
   "name": "PromptType",
   "options": [
    "text",
    "ssml"
   ],
   "required": true,
   "type": "select"
  }
 ],
 "defaultSettings": {
  "PromptType": "text",
  "PromptValue": "This is a prompt that will be played."
 },
}
With this JSON we are able to describe:
- The name of the module and a description of the functionality of the module.
- The settings that are available for the module. These are any of the inputs required for the configuration of the module. In our initial implementation we will allow simple plain text values or lists of defined values.
- Default settings for some or all of the settings
- If the settings is required we can flag it here, otherwise its assumed that the module will run with a default for this setting
- All of the settings also have optional descriptions, although the name should be descriptive enough this can help guide an operations user to the correct type of setting they should be providing
This module meta data will be closely associated with the modules, in a later post we will be looking at how this can be autogenerated and shared, for now though we will just store this in Dynamo.
Now we have a way to describe the settings we want to provide to the modules in connect, we can now look at building a front end to modify and create the settings, starting with an API gateway to give an interface to our modular solution.
API Gateway
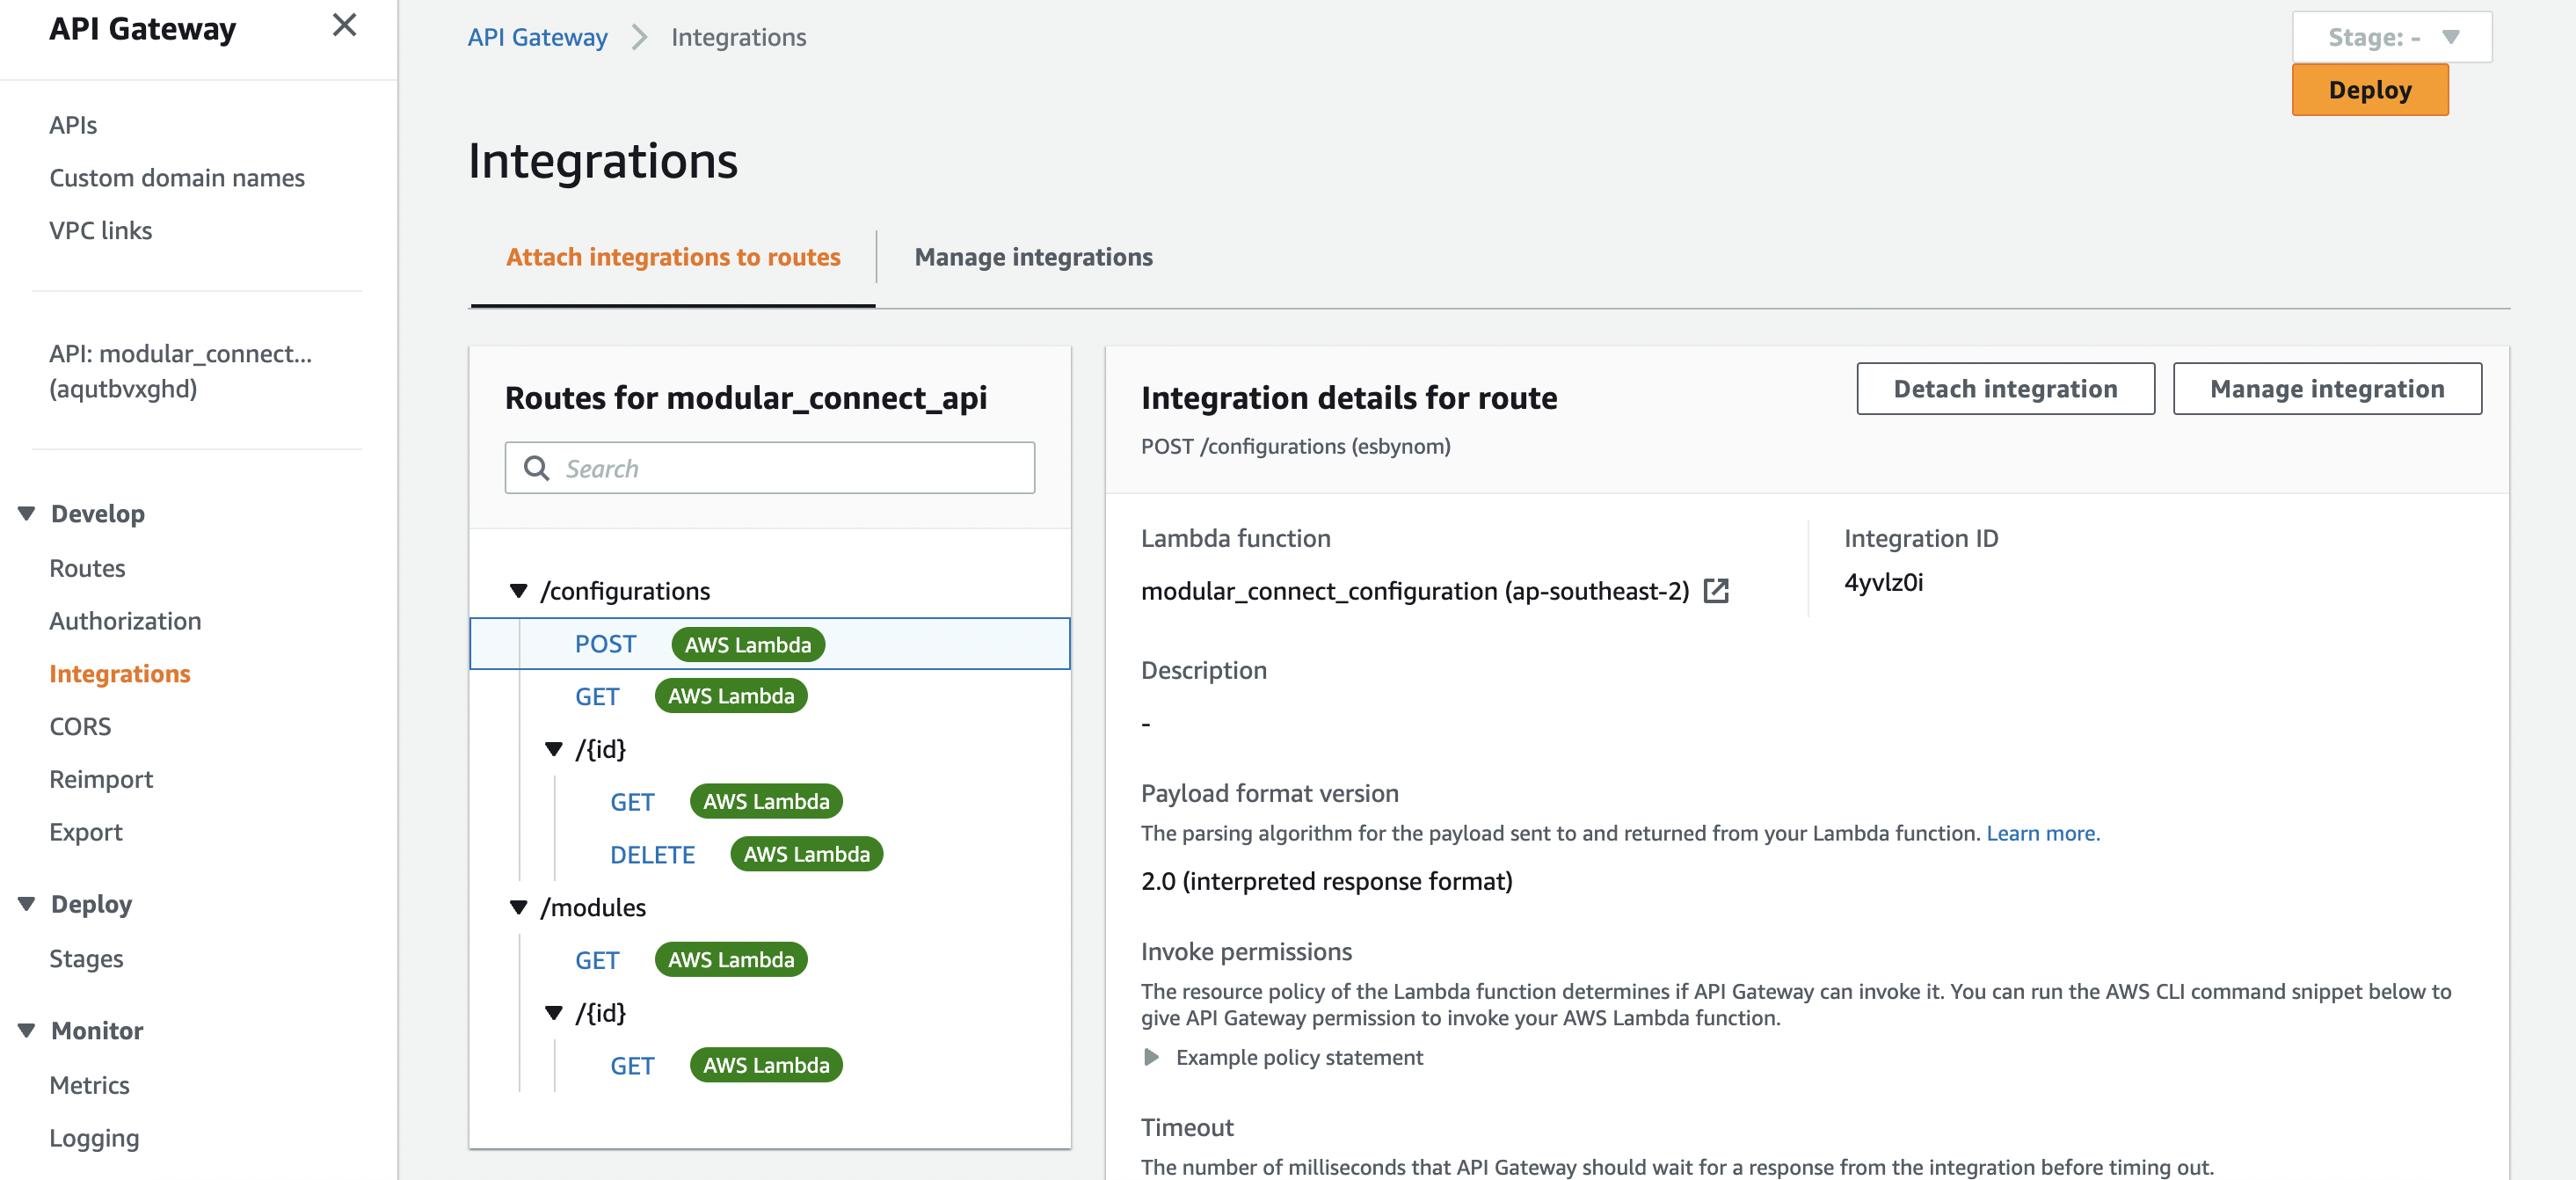
For our solution we need to create a API gateway with a couple of different routes. We want to be able to retrieve the metadata we have created for the modules and we want to be able to write the configuration settings to Dynamo also.
We can handle both of these cases with a single simple lambda, and set this integration in the API gateway. The lambda function will handle both the routes as for the module route it is only allowing a GET, whereas the configuration routes allow for CRUD operations. This could easily be separate lambda functions, but for simplicity sake its composed here in just one:
modular_connect_configuration
import { DynamoDBClient } from "@aws-sdk/client-dynamodb";
import {
  DynamoDBDocumentClient,
  ScanCommand,
  PutCommand,
  GetCommand,
  DeleteCommand,
} from "@aws-sdk/lib-dynamodb";

const client = new DynamoDBClient({});

const dynamo = DynamoDBDocumentClient.from(client);

const configurationsTableName = "modular_connect_configurations";
const moduleDescriptorTableName = "modular_connect_modules";

export const handler = async (event, context) => {
  console.info("EVENT\n" + JSON.stringify(event, null, 2));

  let body;
  let statusCode = 200;
  const headers = {
    "Content-Type": "application/json",
  };

  try {
    switch (event.routeKey) {
      case "GET /modules":
        body = await dynamo.send(
          new ScanCommand({ TableName: moduleDescriptorTableName })
        );
        body = body.Items;
        break;
      case "DELETE /configurations/{id}":
        await dynamo.send(
          new DeleteCommand({
            TableName: configurationsTableName,
            Key: {
              id: event.pathParameters.id,
            },
          })
        );
        body = `Deleted item ${event.pathParameters.id}`;
        break;
      case "GET /configurations/{id}":
        body = await dynamo.send(
          new GetCommand({
            TableName: configurationsTableName,
            Key: {
              id: event.pathParameters.id,
            },
          })
        );
        body = body.Item;
        break;
      case "GET /configurations":
        body = await dynamo.send(
          new ScanCommand({ TableName: configurationsTableName })
        );
        body = body.Items;
        break;
      case "POST /configurations":
        let requestJSON = JSON.parse(event.body);
        await dynamo.send(
          new PutCommand({
            TableName: configurationsTableName,
            Item: {
              id: requestJSON.id,
              phoneNumber: requestJSON.phoneNumber,
              modules: requestJSON.modules,
              name: requestJSON.name,
            },
          })
        );
        body = `Put item ${requestJSON.id}`;
        break;
      default:
        throw new Error(`Unsupported route: "${event.routeKey}"`);
    }
  } catch (err) {
    statusCode = 400;
    body = err.message;
  } finally {
    body = JSON.stringify(body);
  }

  return {
    statusCode,
    body,
    headers,
  };
};
So now that we have a functioning API backend that will allow us to set the different settings for our modular solution, we can now look at building a front end.
Module Front End
The module front end will be used by operations team members to create and administer the functional core of the call center. It allows a user to create and configure call center solutions using any available modules. There are several core pieces of functionality we want to provide with this front end:
- Creating new call center solutions associated with a number in Connect
- Composing the call center by adding modules to the call center
- Configuration of the modules, allowing the customization within the defined limits of the module
- Adding conditional statements to define if a module will be executed at all
- Insertion, removal, and reordering of all modules as required
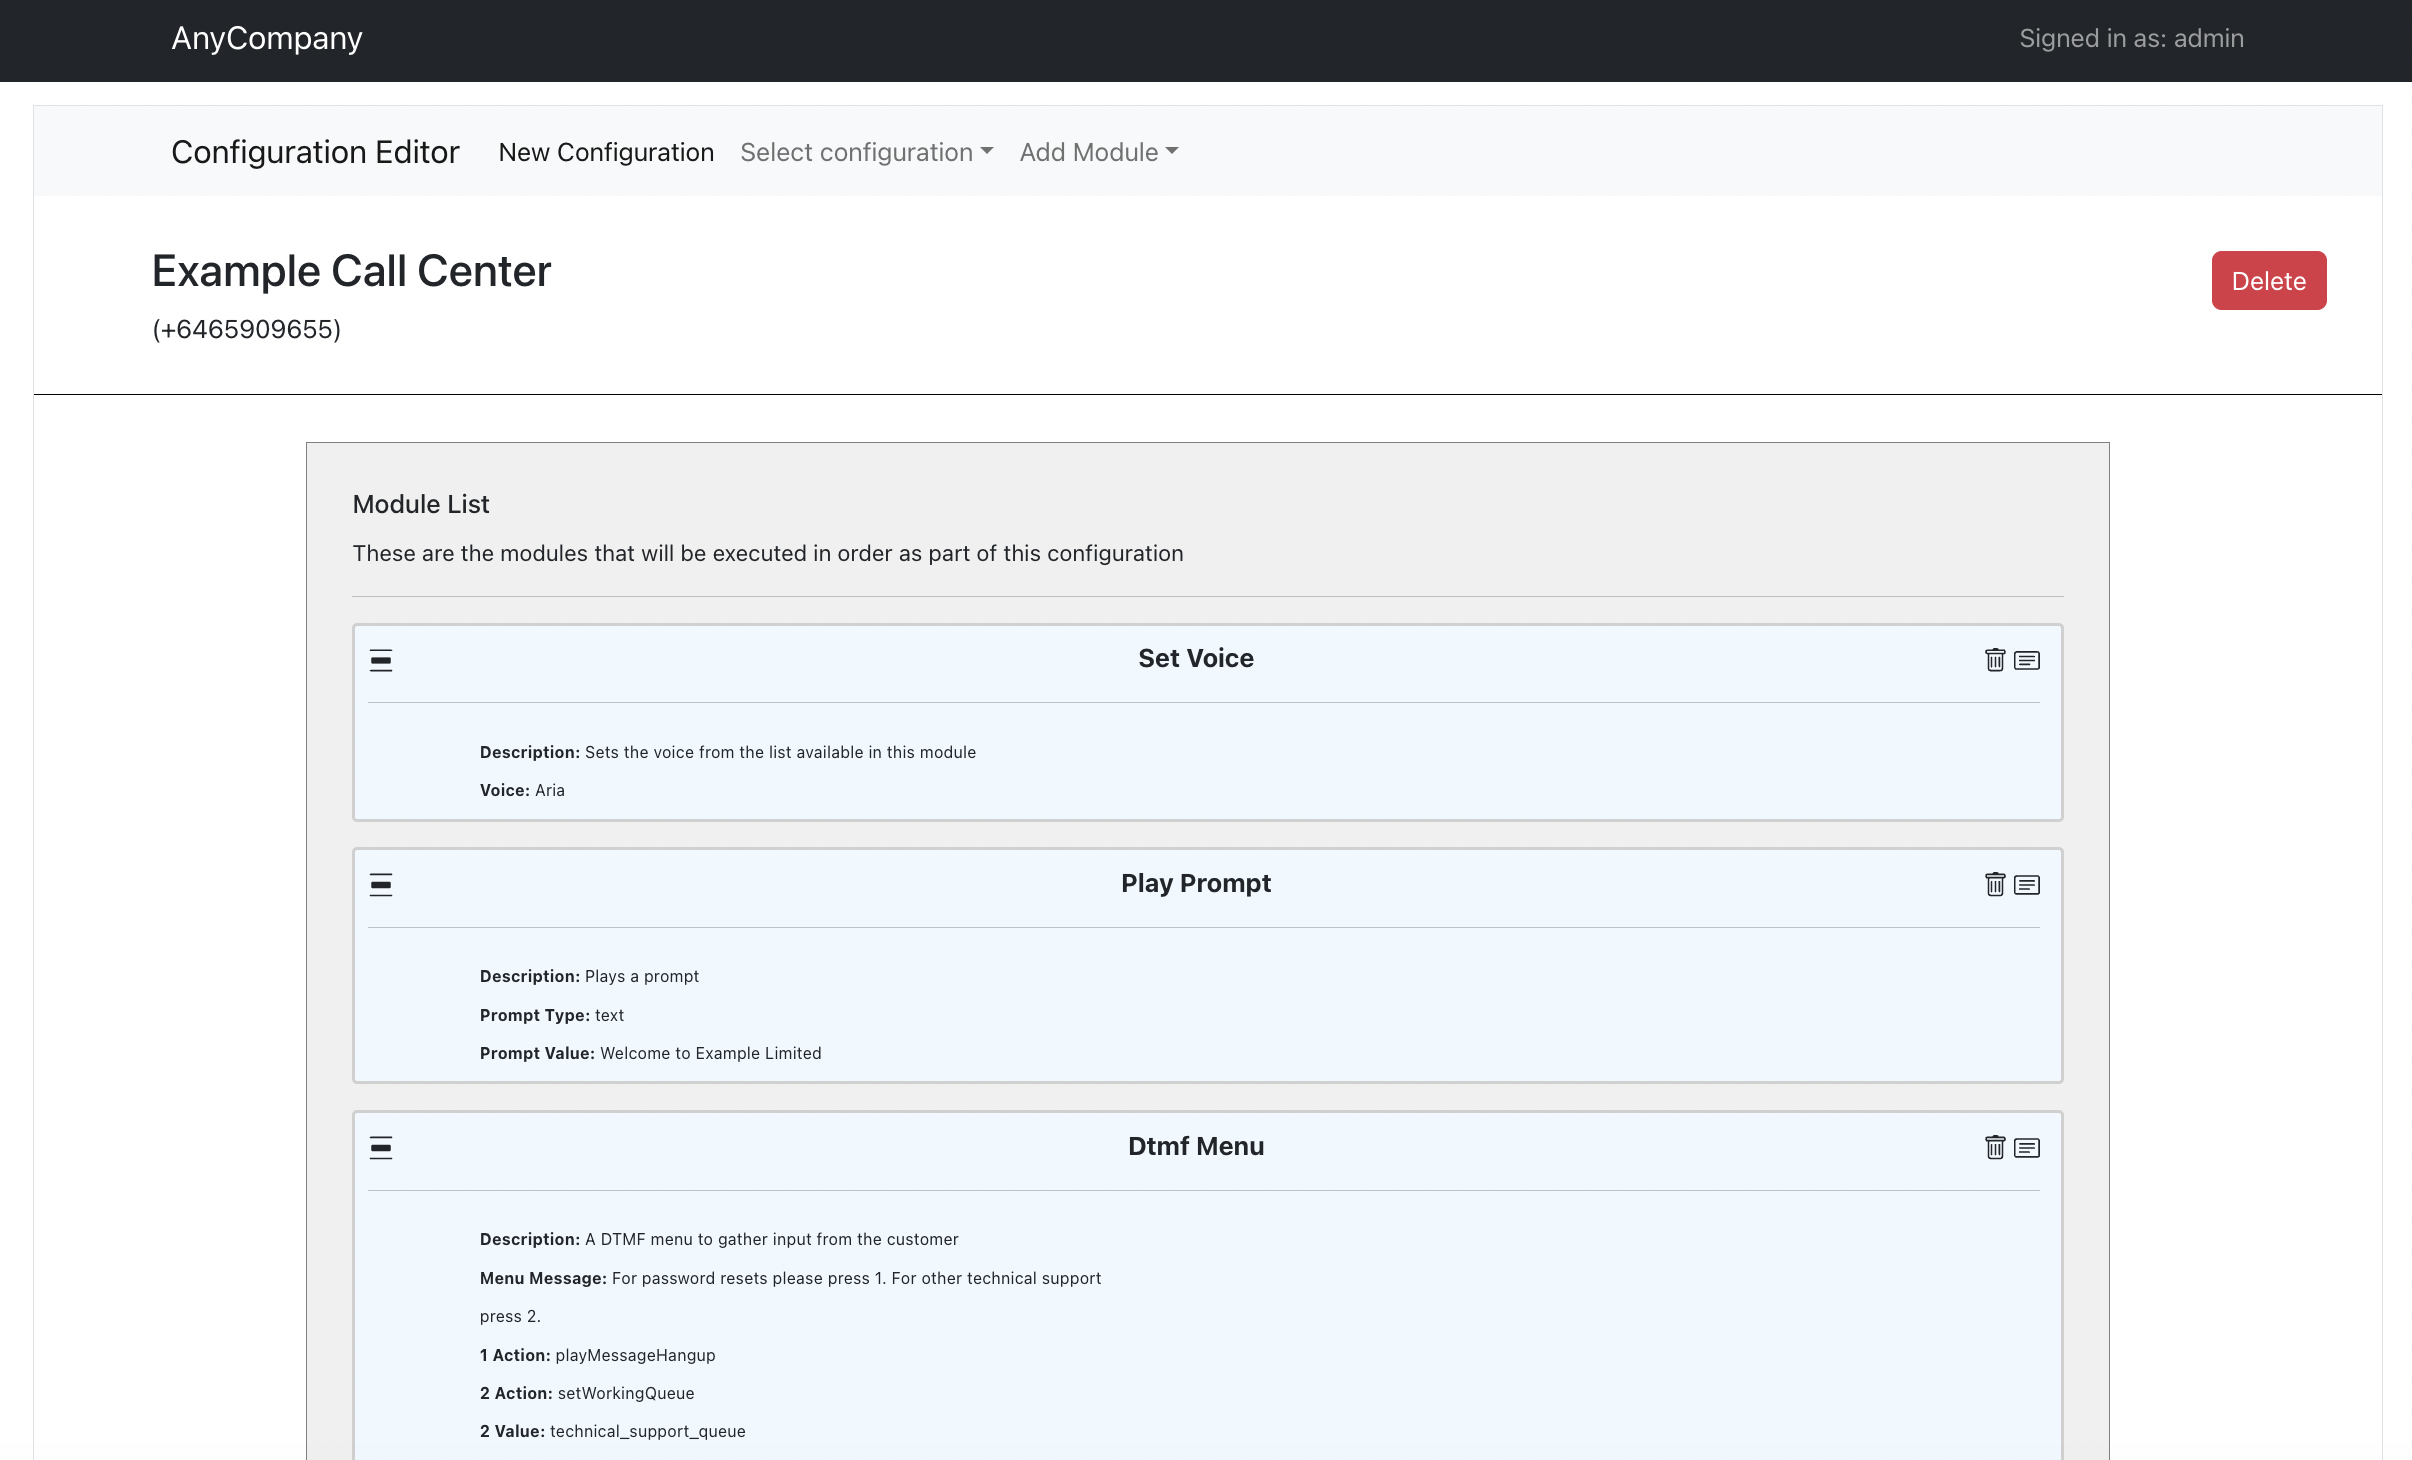
We can create a simple single page application. In this case it is written in React can provides a simple interface to the settings and modules. We display a list of modules that are associated with a given phone number in Connect. These are the modules that will be executed in order whenever a call is placed to Connect.
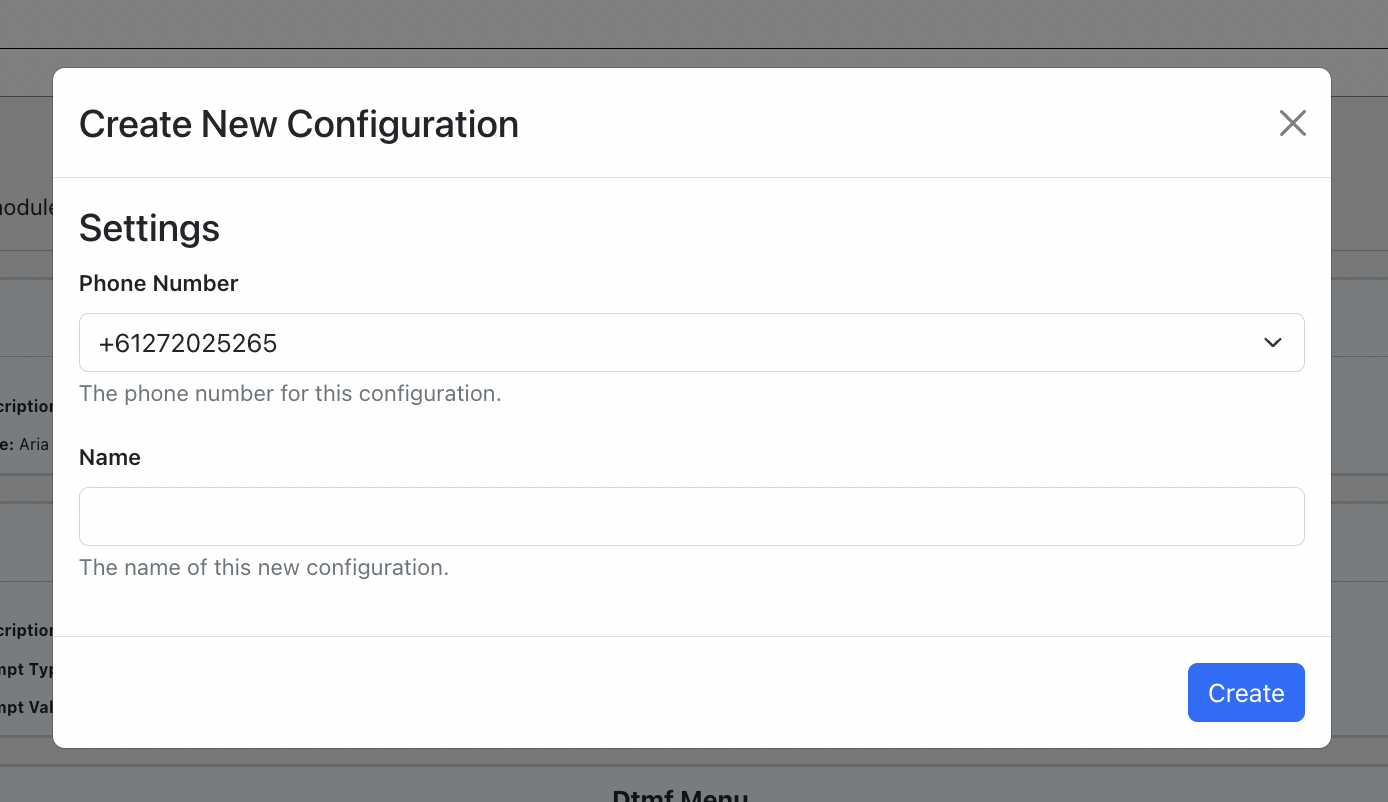
Creation of a new configuration links a phone number to a configuration name.
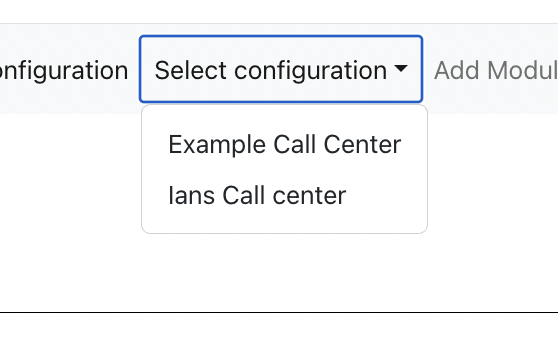
These different configurations can be retrieved and administered separately. This allows fot the cases where a business may have multiple different call centers, but they all are using the same set of modules.
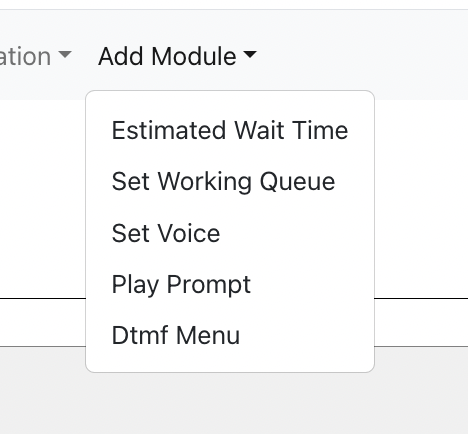
Available modules can be added to the configuration by selecting them from the list. This list is being populated by the API call to our modules metadata that we have stored in Dynamo.
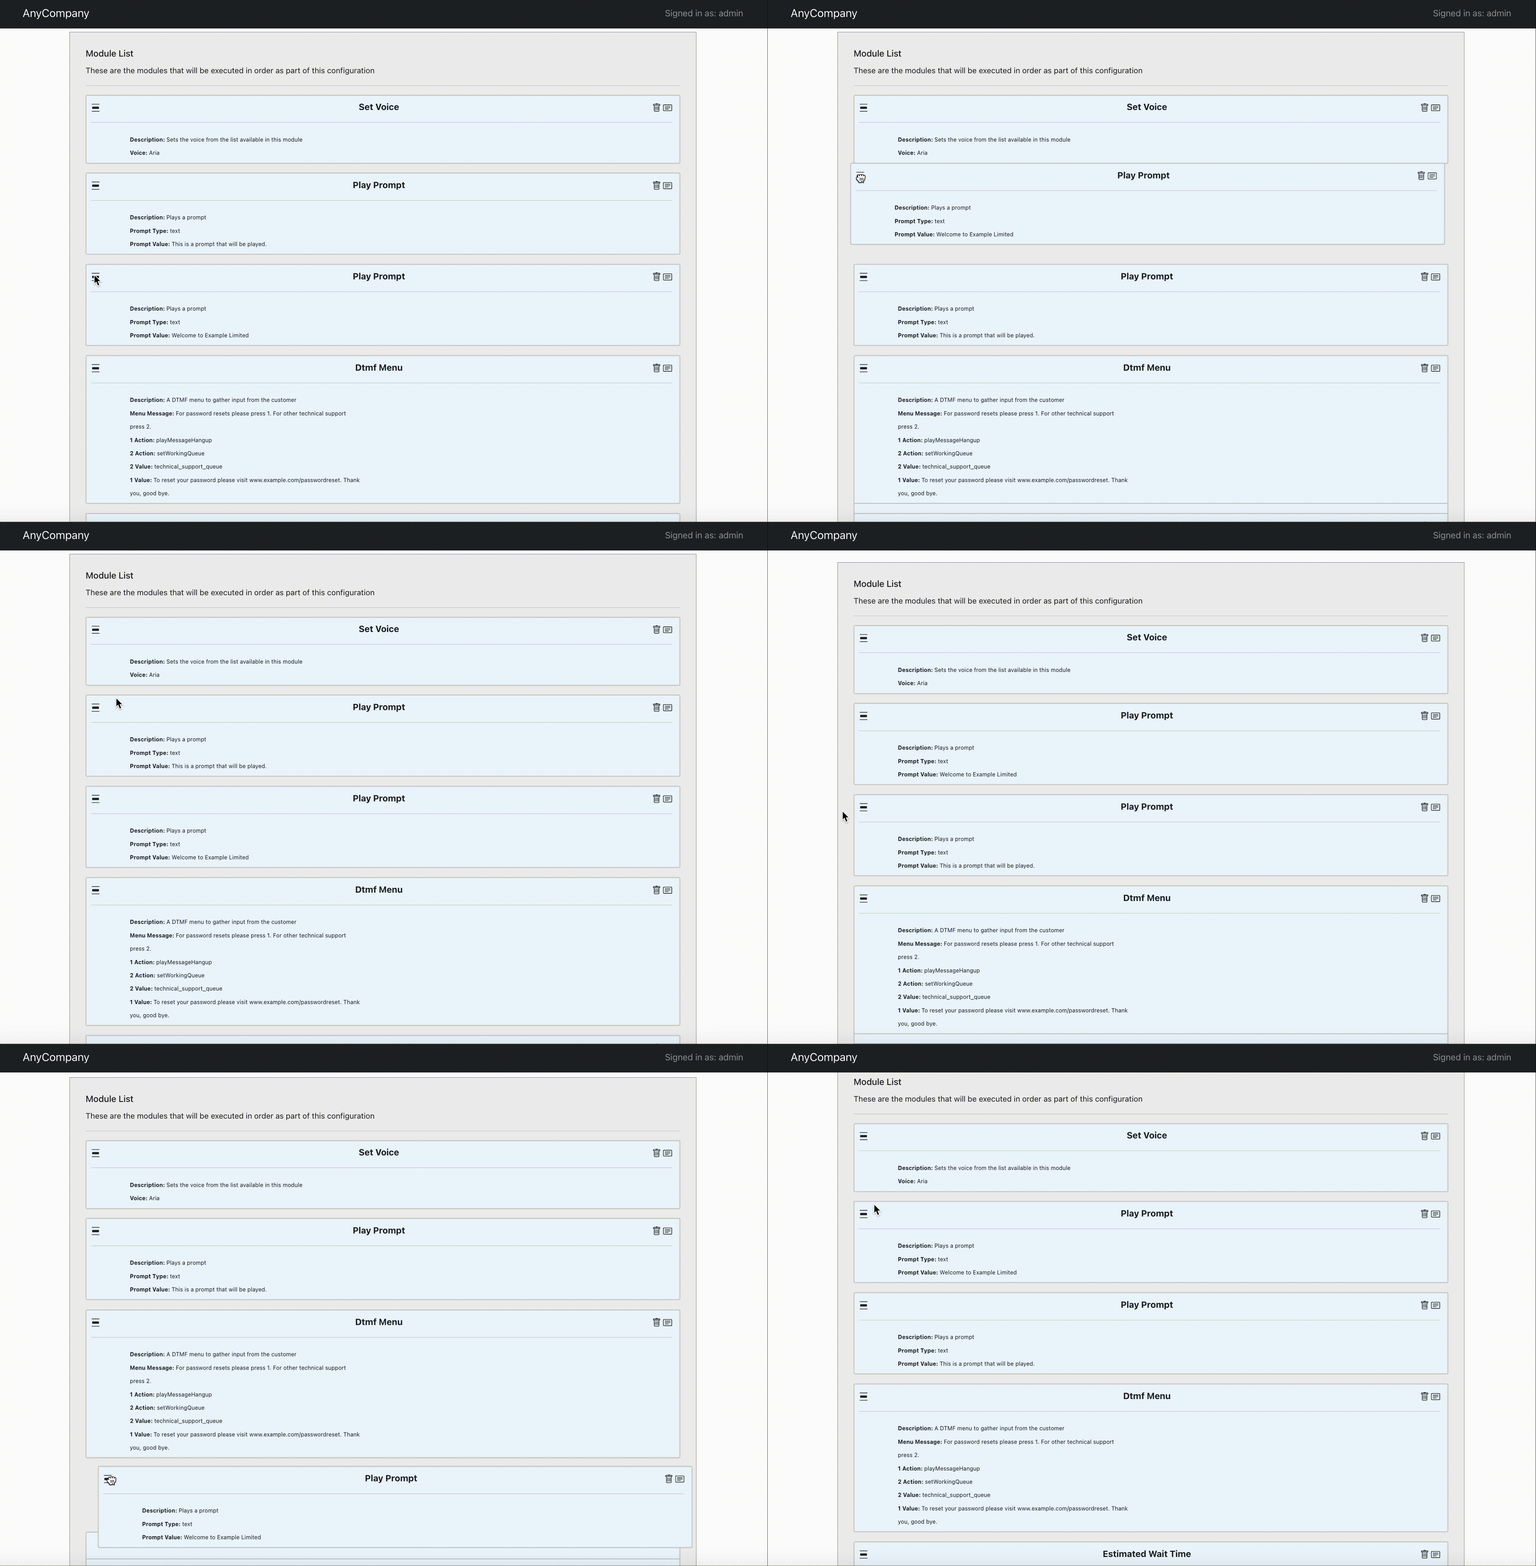
When modules are added they can be reordered and inserted at any point. This is useful when a new module needs be added into an existing flow. For example if there was a requirement to add a banner message at the start of the customer experience.
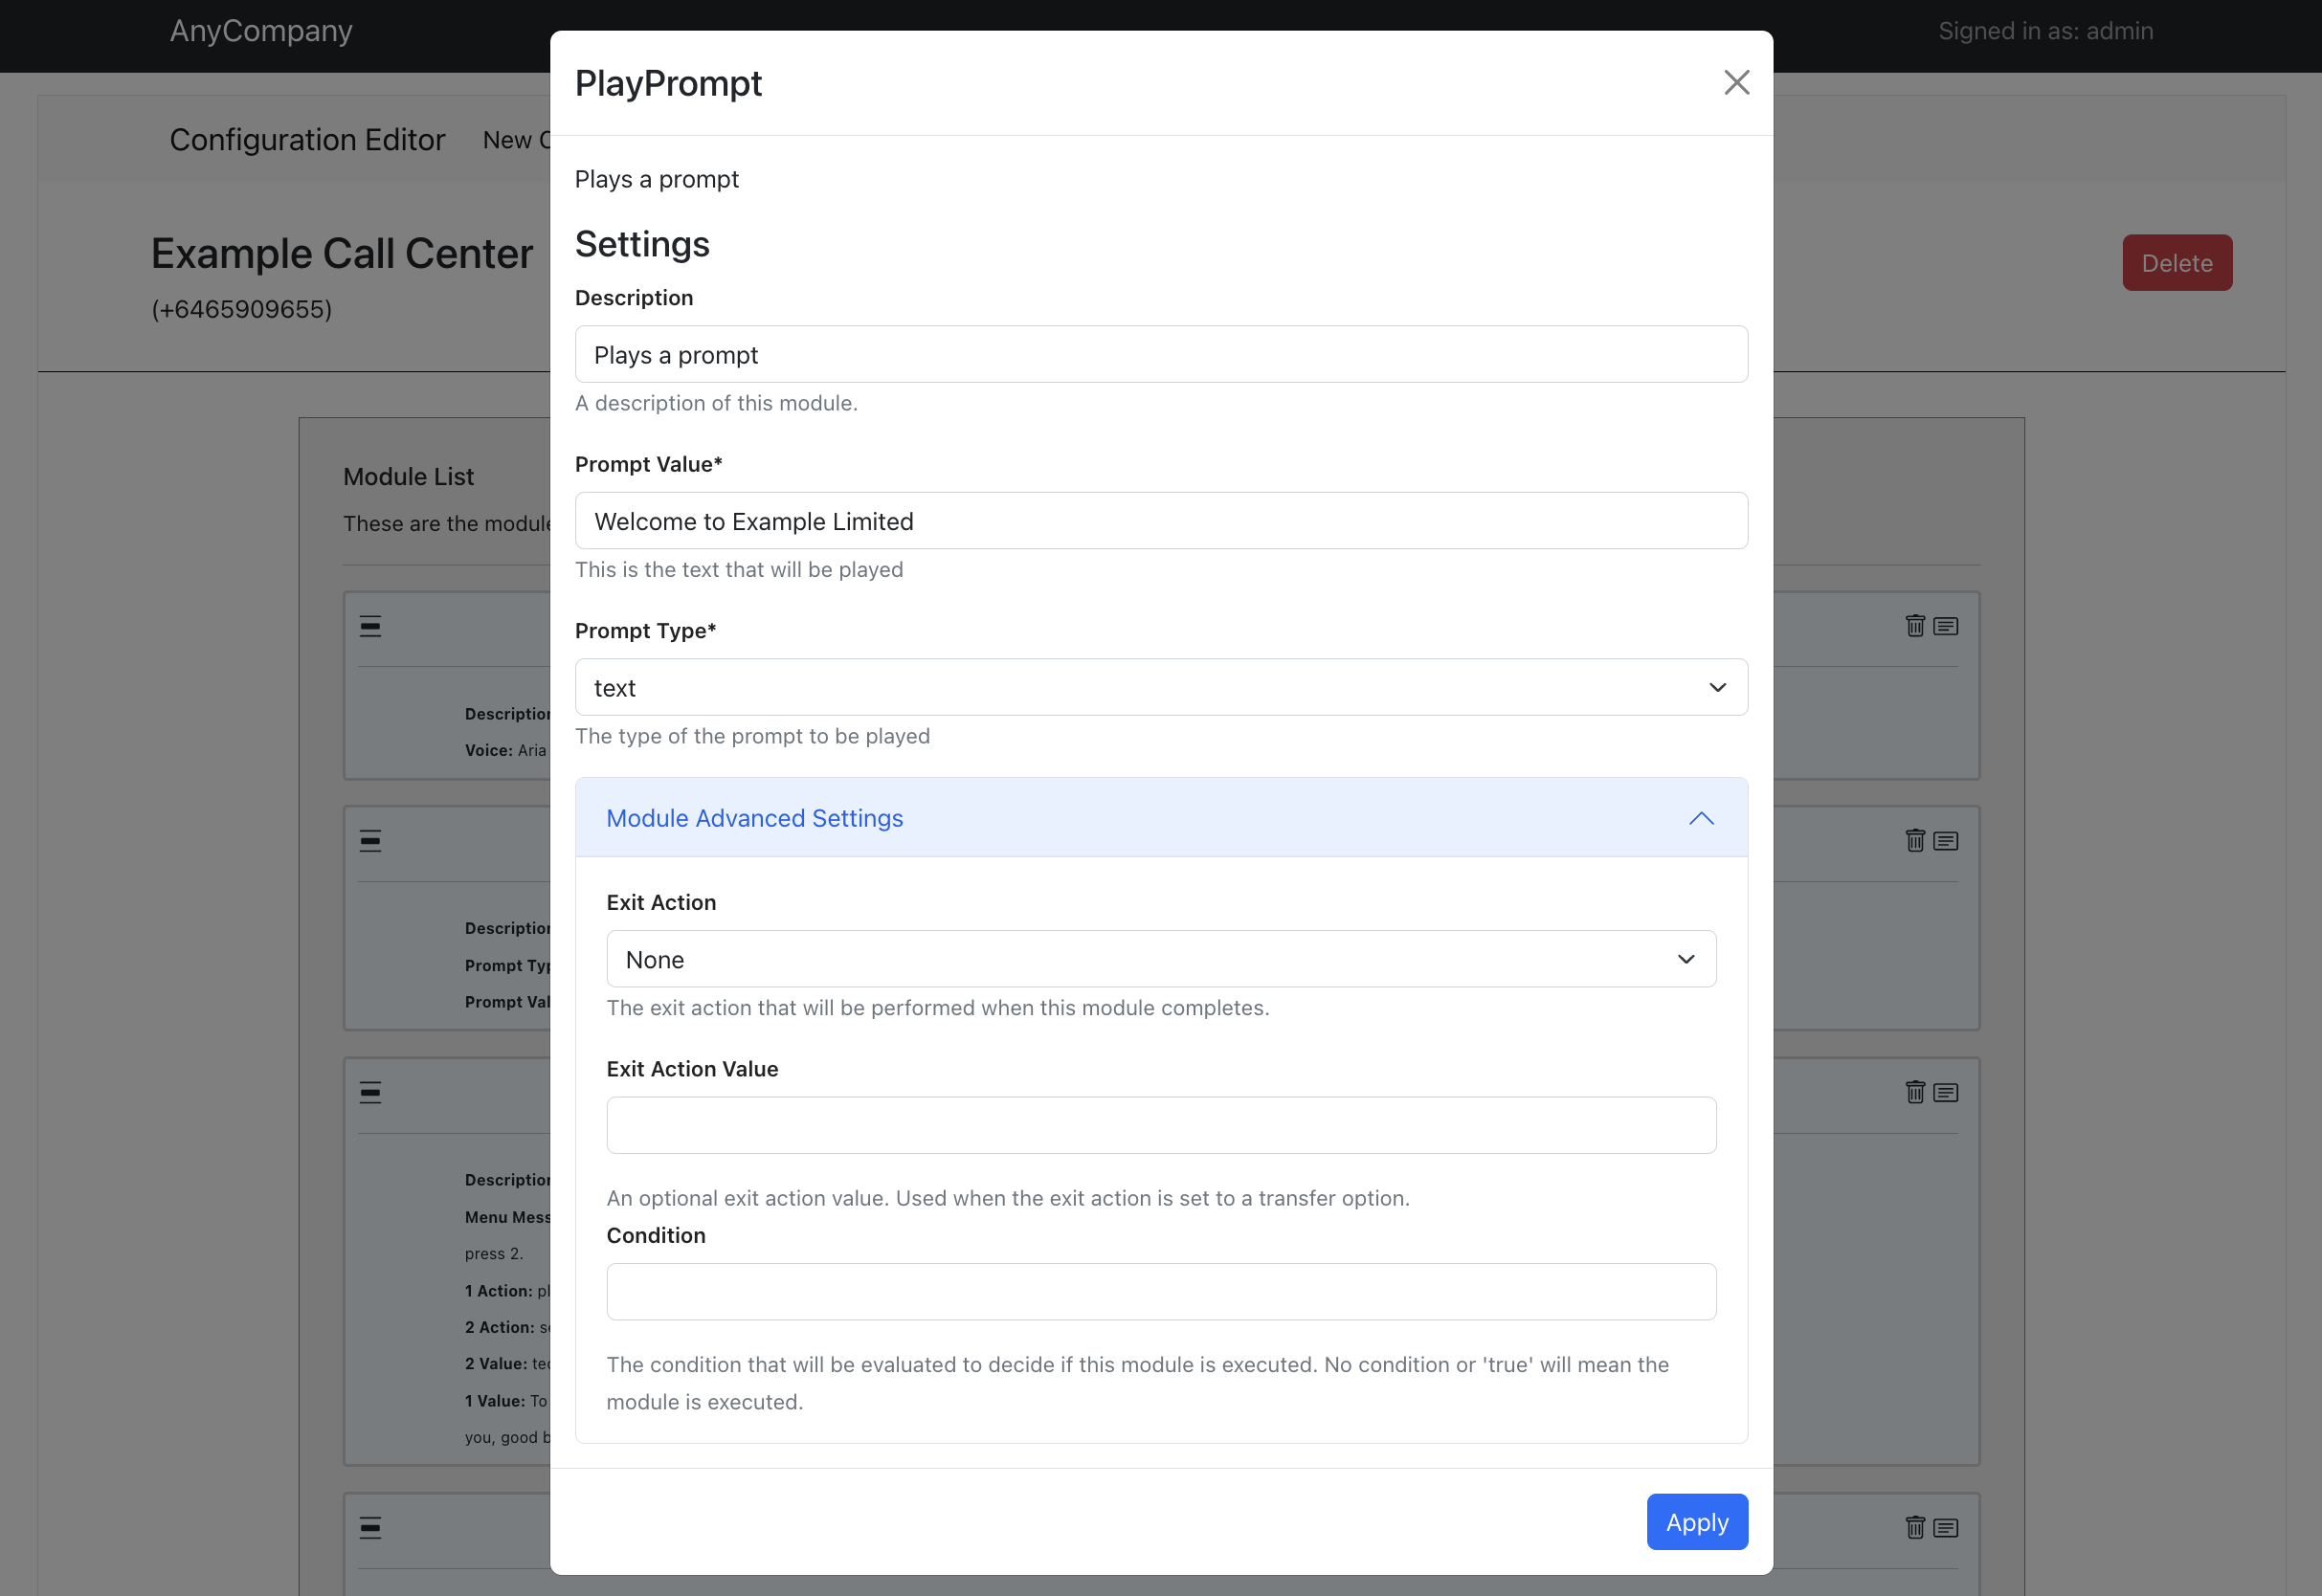
All of the available settings for the modules is dynamically generated from the metadata service. This allows us to display the configuration for any module that has been defined by its metadata. When a new module has been added to Dynamo it will automatically be available for configuration in our front end. This will be important later when we start adding CICD processes to module creation.
In this case we can see the settings for the play prompt module, this is the same example that we discussed earlier and showed the metadata JSON. However we can also have more complex modules with more settings such as a DTM menu.
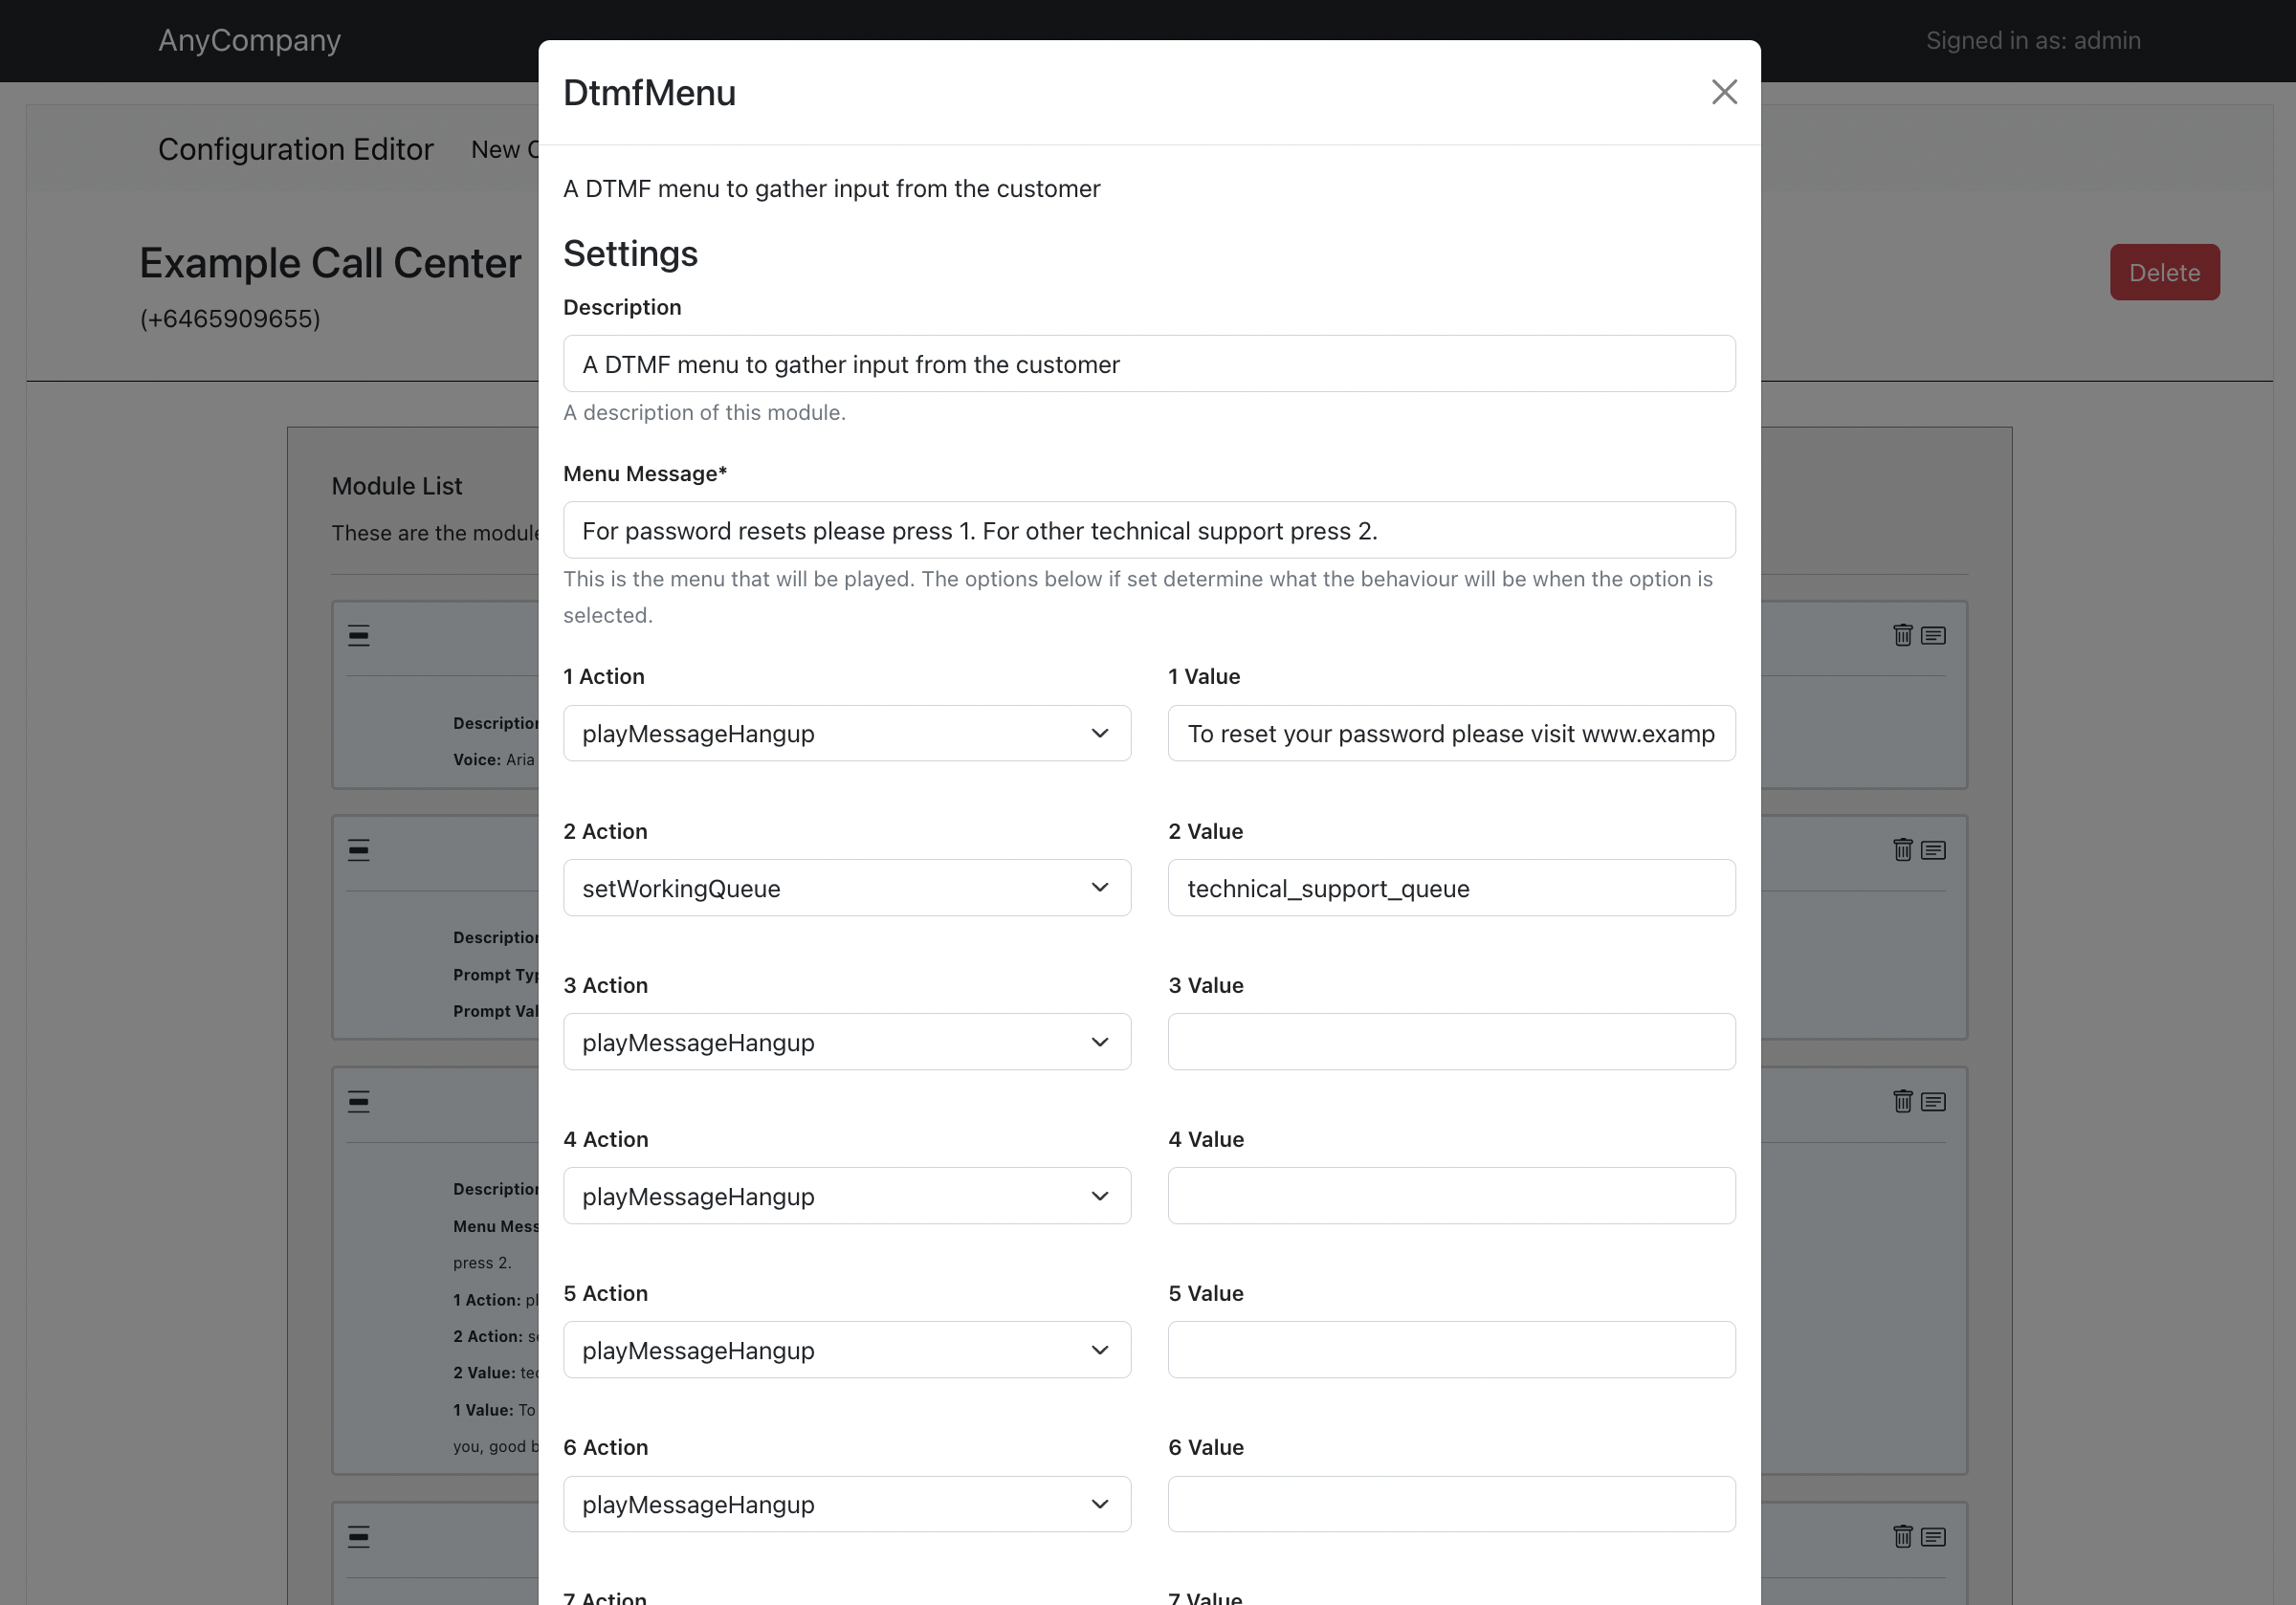
In this case there are a lot more settings available as this module will allow the creation of a full DTMF menu. We start to now see some of the efficiency of using modules, as when we are creating this menu there is no need to specify how timeouts, retries, no inputs, etc all work because it is all handled by the module. The module will have defined a standard and consistent way for those functions to operate, all that is required is the customization settings for the module, in this case the menu prompt and the behavior when an option is selected.
Conclusion
In this blog post we have added a front end for operational support to our modular contact center solution. This is allowing the operation users to configure and maintain a contact center in a safe an consistent way.
In the next blog post in this series we will be looking at adding CICD processes to the solution to allow a full software development lifecycle to the modules.

